NanoCAD
A downloadable tool for Windows and Linux
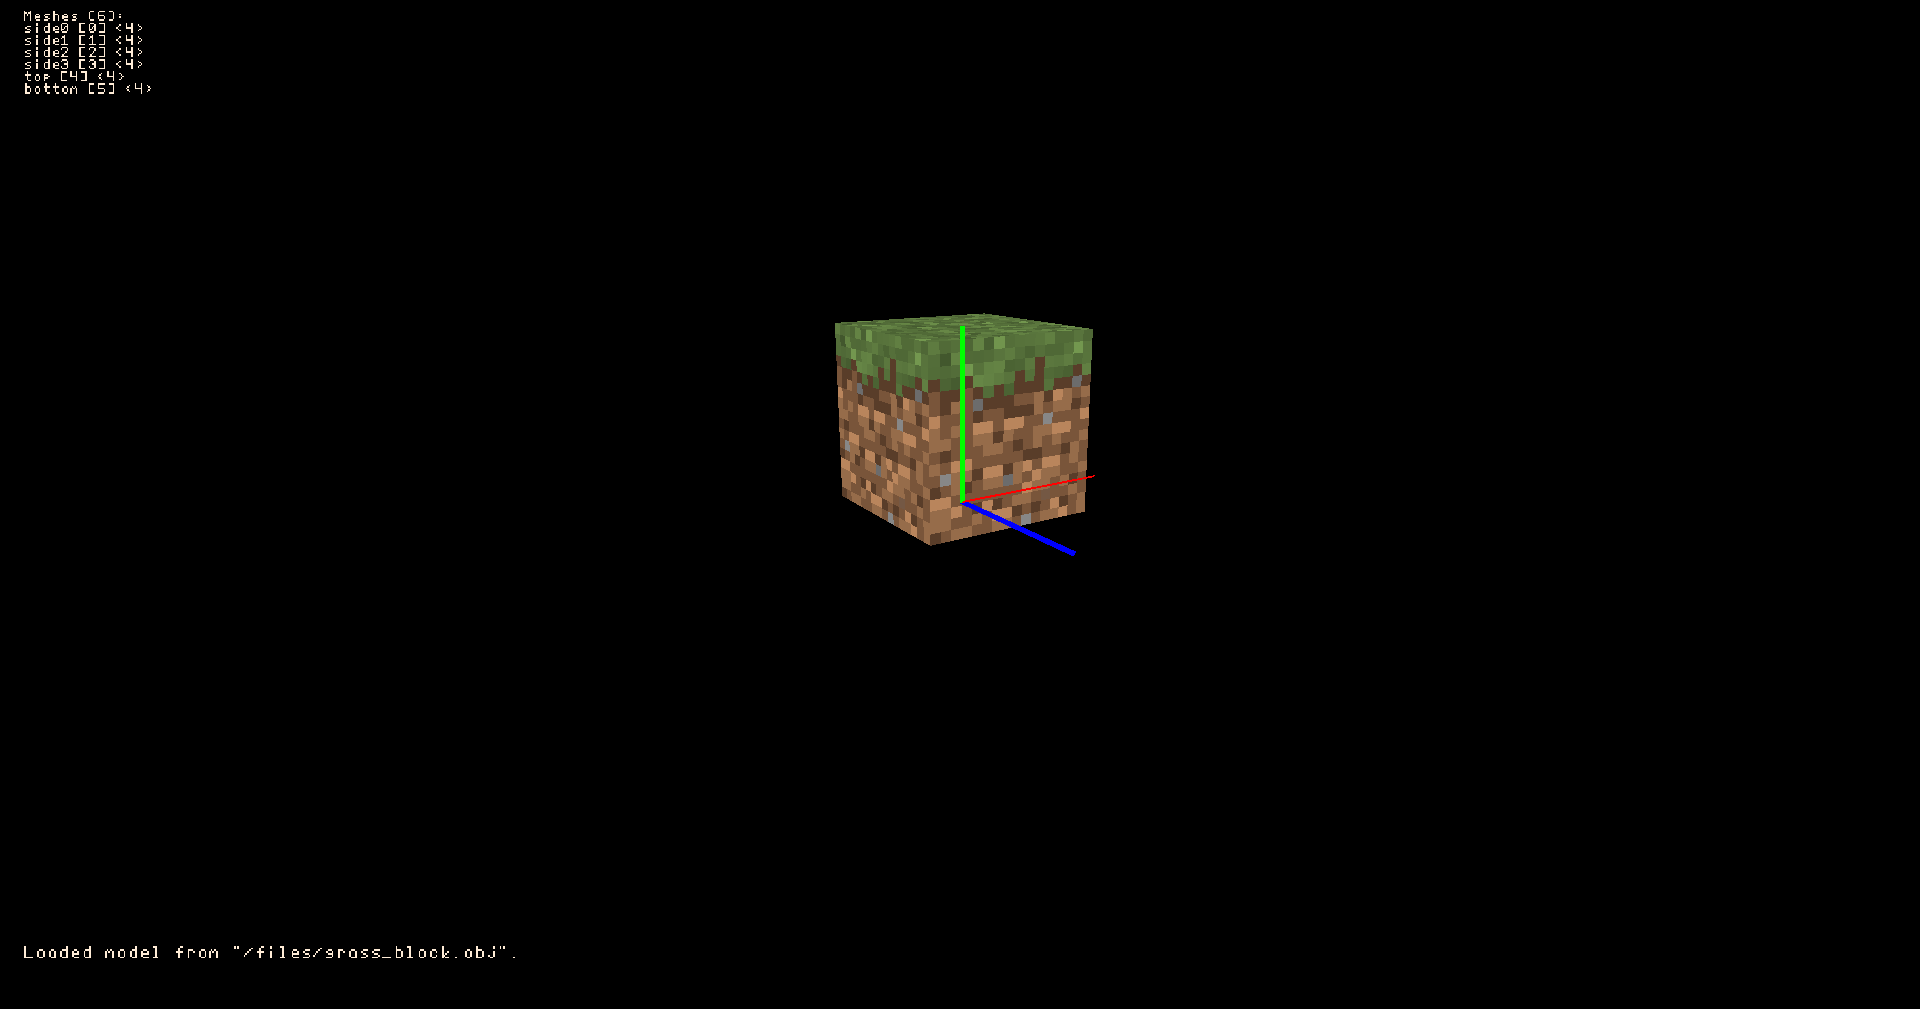
NanoCAD is a simple, text based 3D modeling program for low-poly models that is able to load, edit and save any.obj-file.
NanoCAD is entirely text-based. You never need to touch your mouse to edit a model.
The goal with NanoCAD was to create something that is easy to learn and simple to use.
Running the "help"-command can be used to display all commands, making it easy to learn them, with detailed explanations available here or on NanoCAD's GitHub page (link below).
The source code for NanoCAD can be viewed and downloaded on NanoCAD's GitHub page.
Commands
The camera can be rotated using the arrow keys. When a command makes use of the arrow keys, [CTRL] can be held down to force rotation of the camera instead.
Meanings:
<mesh-id>- The index of any mesh or it's alias.<vertex-id>- The index of any vertex in the previously mentioned mesh.<alias><new-mesh-alias>- Name to give to a mesh. May then be used instead of an index when asked for a<mesh-id>.(...)- Optional parameter.<... ("..."/"..."/"...")>- Value may be one of the values in parentheses, without quotation.
Commands:
help- Shows a list of all possible commands.vinfo/vi- Toggles the visibility of detailed vertex information, showing position and texture mapping for each vertex. Disabled by default.normals/nor- Toggles the visibility of surface normals and their mesh indices. Disabled by default.scroll/scr/s <mesh-id>- Scrolls the mesh data view (top left) to have the given mesh in the center. The mouse wheel can also be used to scroll.new/nw <vertex-count ("3"/"4")> (<new-mesh-alias>)- Creates a new mesh. When passing3for<vertex-count>, a triangle is created. When passing4for<vertex-count>, a quad is created. The new mesh gets the given alias, when one is passed to<new-mesh-alias>.alias/al <mesh-id> (<alias>)- Sets the alias of the given mesh to a new one. When nothing is passed to<alias>, the alias gets removed from the mesh.look/lk <mesh-id> (<vertex-id>)- Sets the camera to always look at the center given mesh (or a specific vertex, if passed) until the[ENTER]-key is pressed or a new command is entered.edit/ed <mesh-id> <vertex-id> <pos-x/"_"> <pos-y/"_"> <pos-z/"_"> <tex-mapping-x/"_"> <tex-mapping-y/"_">- Edits the raw data of a given vertex. When_is entered as a parameter (except in<mesh-id>and<vertex-id>), the value is not modified.move/mv <mesh-id> <step-size>- Enters move mode for the given mesh (until[ENTER]is pressed or a new command is entered), where the given mesh can be moved using the arrow keys. Pressing[0]..[9]moves that vertex only, while pressing[A]moves the entire mesh again. Pressing[X],[Y]or[Z]moves it along that axis. Pressing[ARROW_UP]or[ARROW_RIGHT]adds the value of<step-size>to the position value for the selected axis, while pressing[ARROW_DOWN]or[ARROW_LEFT]subtracts the value. The index of each vertex is also displayed while the command is active.uv <mesh-id>- Enters uv mode for the given mesh (until[ENTER]is pressed or a new command is entered), where the texture mappings of the vertices of the given mesh can be modified using the arrow keys. Pressing[0]..[9]selectes a specific vertex. Pressing[ARROW_UP]subtracts 1 from the texture mapping value foryof the selected vertex. Pressing[ARROW_DOWN]adds 1 to the texture mapping value foryof the selected vertex. Pressing[ARROW_LEFT]subtracts 1 from the texture mapping value forxof the selected vertex. Pressing[ARROW_RIGHT]adds 1 to the texture mapping value forxof the selected vertex. The index and texture mappings of each vertex are also displayed while the command is active.invnor/inor <mesh-id>- Inverts the surface normal vector of a given mesh by inverting the order of all vertices in the mesh.copy/cp <mesh-id> (<new-mesh-alias>)- Creates a copy of the given mesh. The new mesh gets the given alias, when one is passed to<new-mesh-alias>.remove/rem/rm <mesh-id>- Deletes a given mesh.clear- Deletes all meshes.load/ld <model-name>- Loads the model from the.obj-file at/files/<model-name>.obj, where the path root is the installation directory.save/sv <model-name>- Saves the model and a material file to/files/<model-name>.objand/files/<model-name>.mtl, where the path root is the installation directory. The material file points to<model-name>.png, so the current texture at/res/texture.pngshould be copied next to the model files and renamed to<model-name>.objbefore using the model.texture/tex- Reloads the texture from/res/texture.png, where the path root is the installation directory. When loading a model, the texture should be loaded BEFORE loading the model file usingloadorld.
Download
Install instructions
Download the file for your platform (nanocad-windows.zip for Windows, nanocad-linux.zip for Linux) and extract the file (you can move the extracted directory wherever you want the program to be installed in).
On Windows, run NanoCAD.exe (located in the extracted directory).
On Linux, run NanoCAD (located in the extracted directory). You may be required to run chmod +x ./NanoCAD and chmod +x ./jre/bin/java in the program directory.
Leave a comment
Log in with itch.io to leave a comment.